
Alerting metrics and setting thresholds are crucial elements when monitoring your infrastructure, but they need to be done right. The job is stressful enough, and setting off alarms when there is no real issue just takes away the focus from real issues, uses precious time, and adds to your stress. Your environment is ever-changing, and you will be adding and removing alerts and changing thresholds as your environment changes.
This post offers a few basic examples of suggested metric thresholds, along with simple instructions on how to create alerts in the AppOptics™ solution. Every environment is slightly different, and you will need to tweak thresholds and durations to suit the environment as it is never static. To be successful setting alerts and thresholds, they need to be simple and straightforward to implement and modify.
When creating alerts in AppOptics, the process is essentially the same no matter which metric you choose. You start by defining the alert condition(s), like which metric to use, what condition type you need, a threshold, and a duration. There are obviously some other built-in options along the way, but we’ll start with step-by-step instructions on how to set up a relatively simple alert for high CPU utilization.
At the end of the post, we provide a few other ideas about some initial thresholds on popular metrics to track. Wherever possible, we’ll provide a range—from strict thresholds, which may generate some unnecessary noise—to more lenient, which may allow certain events to slip through unnoticed.
Watch the video, and then read the post for helpful details about every step.
Creating Alerts in AppOptics
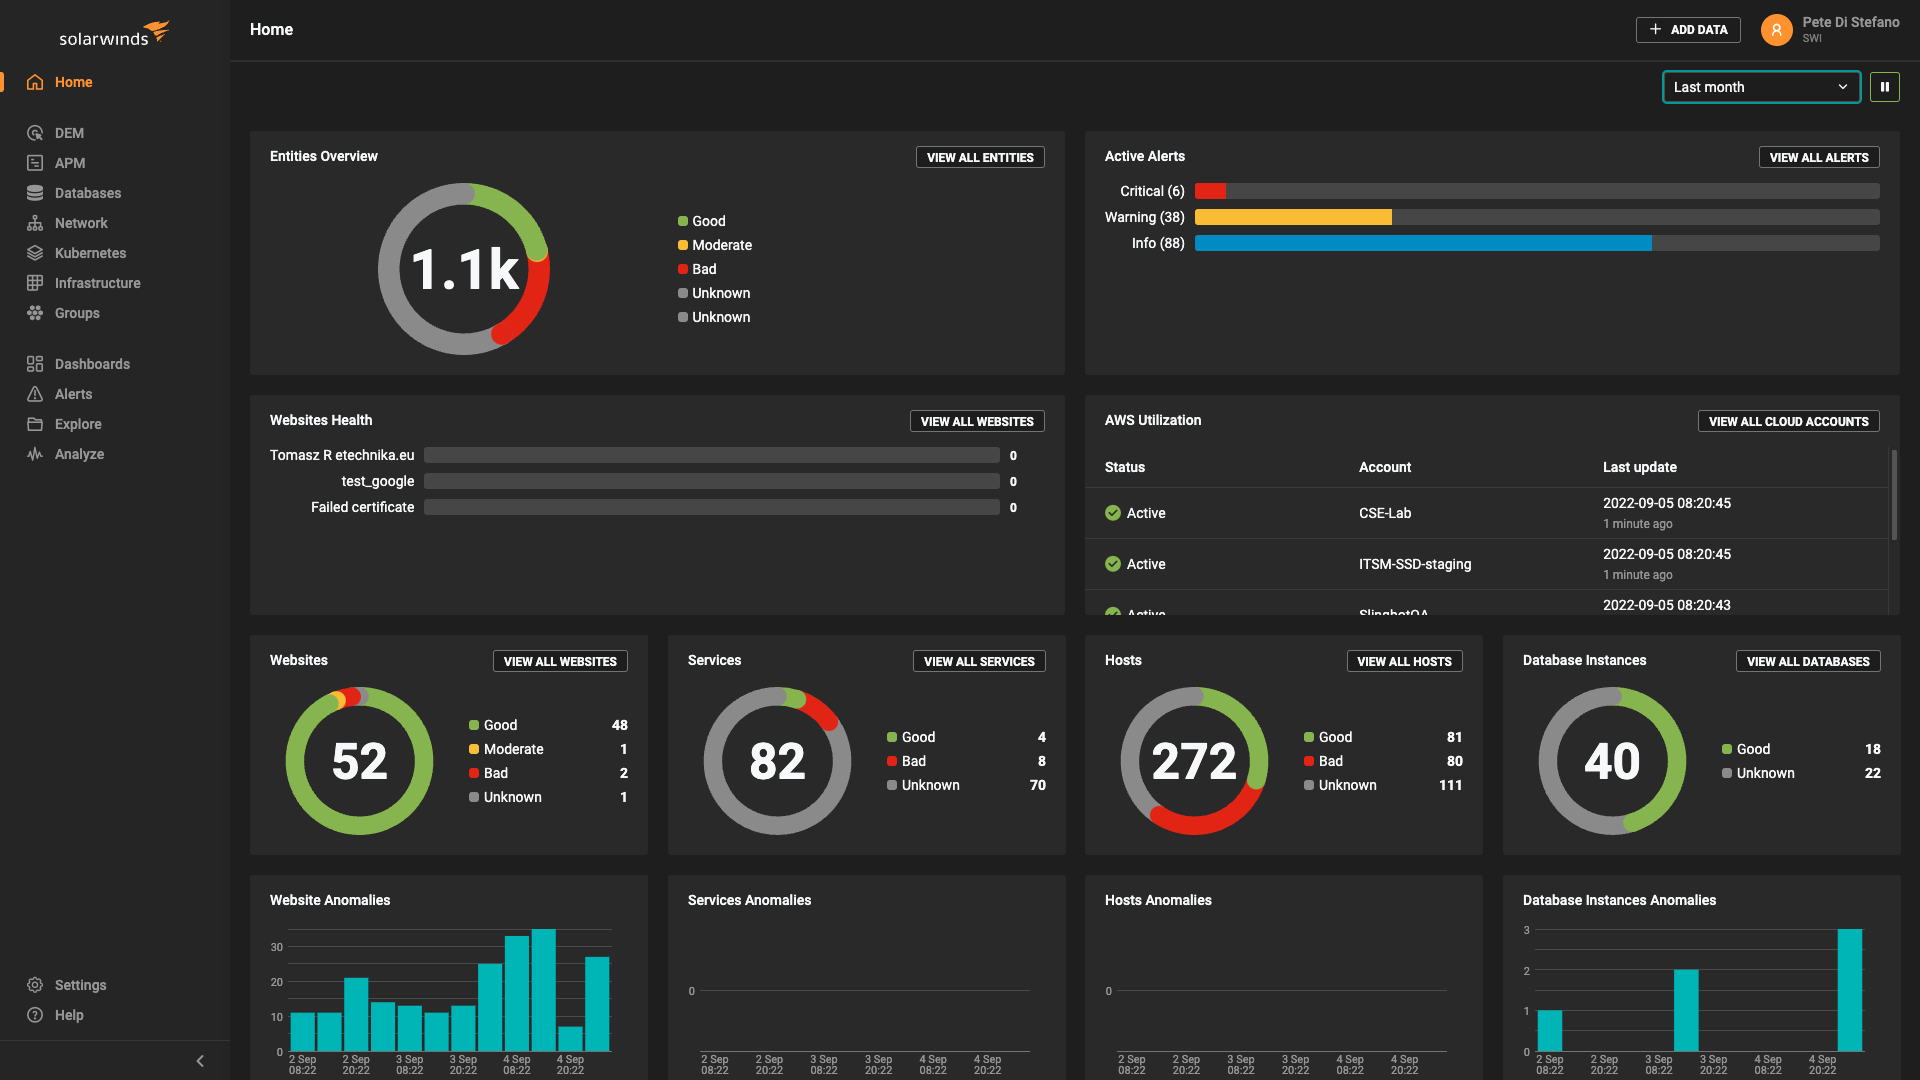
From the AppOptics home screen, start by clicking on View All.
View all takes you to the Alert Central, where you can see all your alerts, whether any are in a triggered status, any that have been recently resolved, and any others that have not fired recently. You can also disable alerts from this screen if you’ve got maintenance or are aware of the issue and want to stop receiving alerts while the issue is being resolved.
From the Alert Central, there’s a + create new alert button on the top right—that’s where we’ll start.
Naming Conventions
At the next menu, we will give our alert a name; it’s best to give it a descriptive name, one which would allow someone to easily determine what the alert is saying. For example, “CPU.Utilization_over.95-5min” is probably a better name than “High.CPU,” especially if you’re working in an environment where the person setting up and managing the monitoring and alerting isn’t necessarily the same individual receiving them. Similarly, try to keep a standard naming convention, such as Metric_threshold–duration. Depending on individual use cases, you might also want to include server name or app name in the alert name.
Also notice the while triggering notify every field. This field tells AppOptics how long to wait before re-sending an alert. For our example, we’re waiting 10 minutes (after the initial five minutes) while CPU is above 95% before we send out another alert. Keep in mind that if we set the alert to a 5-minute threshold and the “while triggering” at 10, we’d get an alert after five minutes of sustained CPU, then not again for 10 minutes. However, if CPU utilization drops below 95% in that time and then returns, the alert may fire again in less than 10 minutes.
Alert Conditions
After naming the alert, we must create the condition for monitoring and alerting. Clicking on create new condition brings us to the Condition Definition page. Here we’ll pick the condition type, which metric to set the alert on, any filtering and grouping we want, the threshold, and the duration.
The options for condition type are: goes above, falls below, and stops reporting. We’ll choose goes above for our example. Other examples below will use other condition types.
Choosing Metrics
Now we want to choose the metric. If you’re already familiar with the metrics monitoring available through AppOptics, you can start typing the one you want in the set alert on field, and it will auto-populate a list. Otherwise, you can use the menu button to bring up a complete list of all metrics available. We’ll be using system.cpu.utilization for this example.
Tagging
Once you choose the metric, you’ll see some suggested tags populate in the next section, which allow you to specify an individual or subset of hosts, regions, etc. for an alert. Tags give you a great deal of flexibility for customizing your alerts across your environment. For example, certain hosts may not fit into a general alert, and you’d want to filter them out. This way you have that power. Once you pick a filter—host, for example—you can then select one or many to apply this alert to. Similarly, you can choose to group by a specific tag as well, such as when monitoring AWS region or instance type.
Summary Function
The next condition to define is the summary function, which is most often left as the default of average. It could also be expressed as the minimum, maximum, sum, count, and derivative. Note: these other functions are only available if you’re using pre-aggregated measurements or if you’re using server-side aggregation.
Define Alert Threshold
Now we need to determine a threshold. For this example, we’re just using a generic best practice threshold, so we know it coming in. However, if you’re unsure at the outset, you can use the Preview button to get a quick snapshot of what the metric has been reporting as for the last hour, and you can drag the slider to set a threshold visually, instead of just guessing at an appropriate value.
The last thing to do for the Condition Definition is to set the duration the condition must be met before we fire off an alert. You can choose any value in minutes or alert immediately. After setting the duration, click the add condition button in the upper right corner.
You can add multiple conditions if you’d like – but keep in mind that the alert will only fire when ALL alert conditions have been met simultaneously.
Alert Notification Services
The final steps to adding an alert are to determine the notification services you’re going to use. You can add in standard email addresses, but you also have the option to additionally send to PagerDuty, Slack, VictorOps, Amazon SNS, Zapier, or a Generic Webhook if your preferred alerting system software or notification service can accept that.

Once you’ve got your notification services set, you can either create the alert with the create button, or you can click Save and Test Fire Alert. And that’s it. Not so alarming after all!
Helpful Alerting Metrics
Here is a list of some common alerts. It’s not an exhaustive list in terms of encompassing all alerts you might want to configure, nor comes close to the limits of what AppOptics can do, but it’s a good starting point for someone who is new to alerting with AppOptics or new to infrastructure monitoring and alerting in general and looking for some guidance.
We’d love to hear your ideas for future guides or alerts you’re using and want to share with the community, so leave a comment and maybe you’ll be featured in the next edition!

The SolarWinds and SolarWinds Cloud trademarks, service marks, and logos are the exclusive property of SolarWinds Worldwide, LLC or its affiliates. All other trademarks are the property of their respective owners.